Before starting the Feno test, please ensure the following:
- Both the Feno machine and tablet are sufficiently charged.
- Feno machine is successfully paired with the tablet under device Bluetooth settings.
Once these above prerequisites are fulfilled, please follow the below steps:
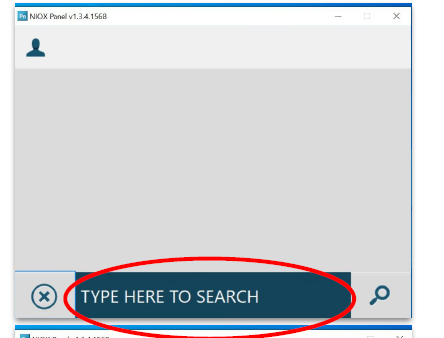
- Open the Niox Panel app.
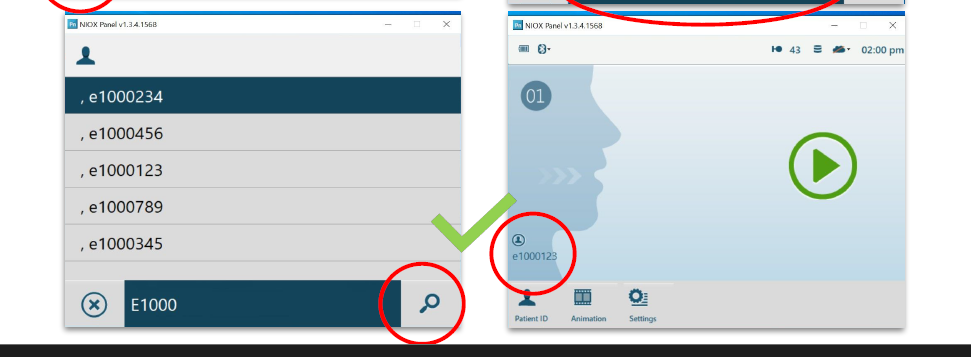
- On the bottom left corner, you will see patient ID option. Click on it and enter the patient ID with whom you want to start the Feno test.

- Once the patient ID is selected, click on the green button.
- You will now see a cloud animation.
- Now, gently perform the inhalation/exhalation and make sure the cloud propagates forward while being on the middle of the screen.
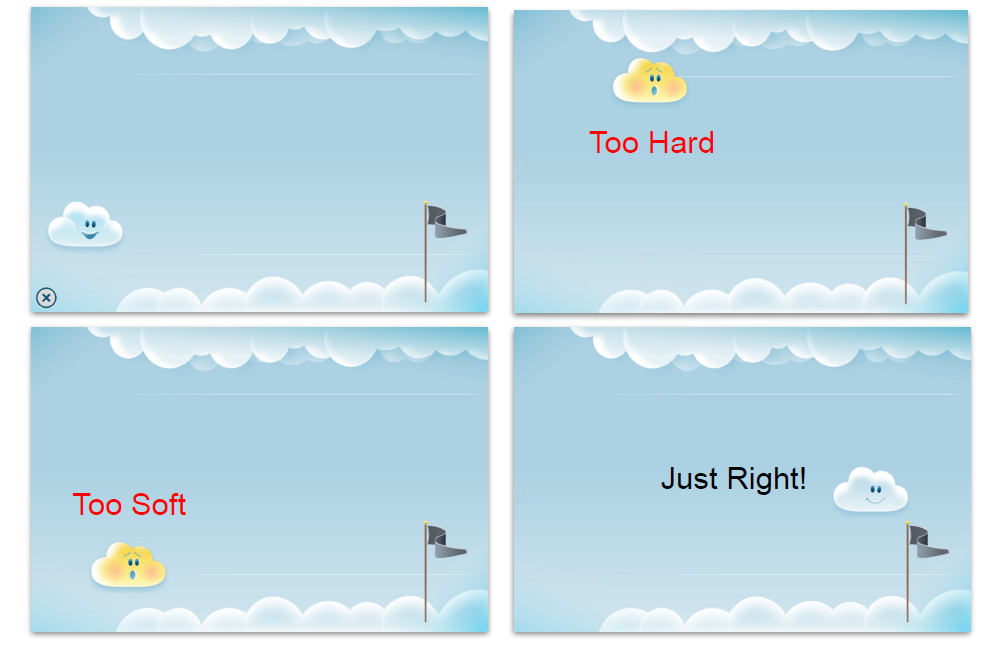
- If the effort is too low, the cloud will drop down and if the effort is too high, the cloud will rise to the top. Just make sure the cloud is balanced in between.
- Once the test is completed, a happy cloud icon will be shown along with a countdown timer. Let the timer complete.

- After the countdown is over, the result will flash immediately for a second.

- In order to view the Feno test results, just login into the dashboard and go to the patient data section.
Note: Always ensure to enter the patient ID before starting the Feno test otherwise, the test data will get orphaned and then you will need to submit a DCR form to upload the test data to patient's dashboard.
Was this article helpful?
That’s Great!
Thank you for your feedback
Sorry! We couldn't be helpful
Thank you for your feedback
Feedback sent
We appreciate your effort and will try to fix the article